This article will guide you through the process of setting up Facebook with Social Login extension for UsersWP.
Settings Overview
- Enable Facebook – To enable Facebook logins, you need to enable this option.
- Facebook API ID – This is where you will enter your Facebook API ID.
- Facebook API Secret – Enter your Facebook app secret key here.
- Let the User Enter the Username? – If checked, the user will be allowed to choose a username (if unchecked, username is automatically generated).
- Let the User Enter Email? – If checked, users can enter an email of their choice. If unchecked, the email returned by Facebook is used.
Setting up Facebook with Social Login
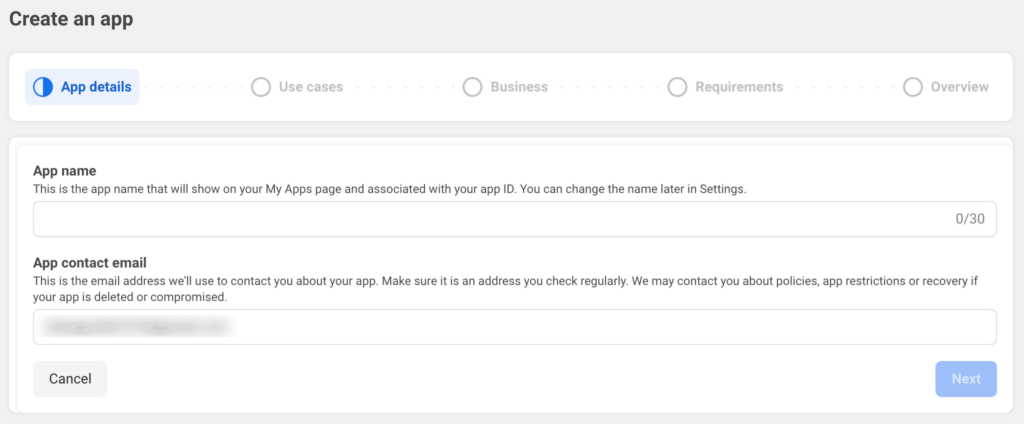
First go to Facebook Developer Site and Click on Create App button which will open following page where you need to enter App name and App contact email and click on next.
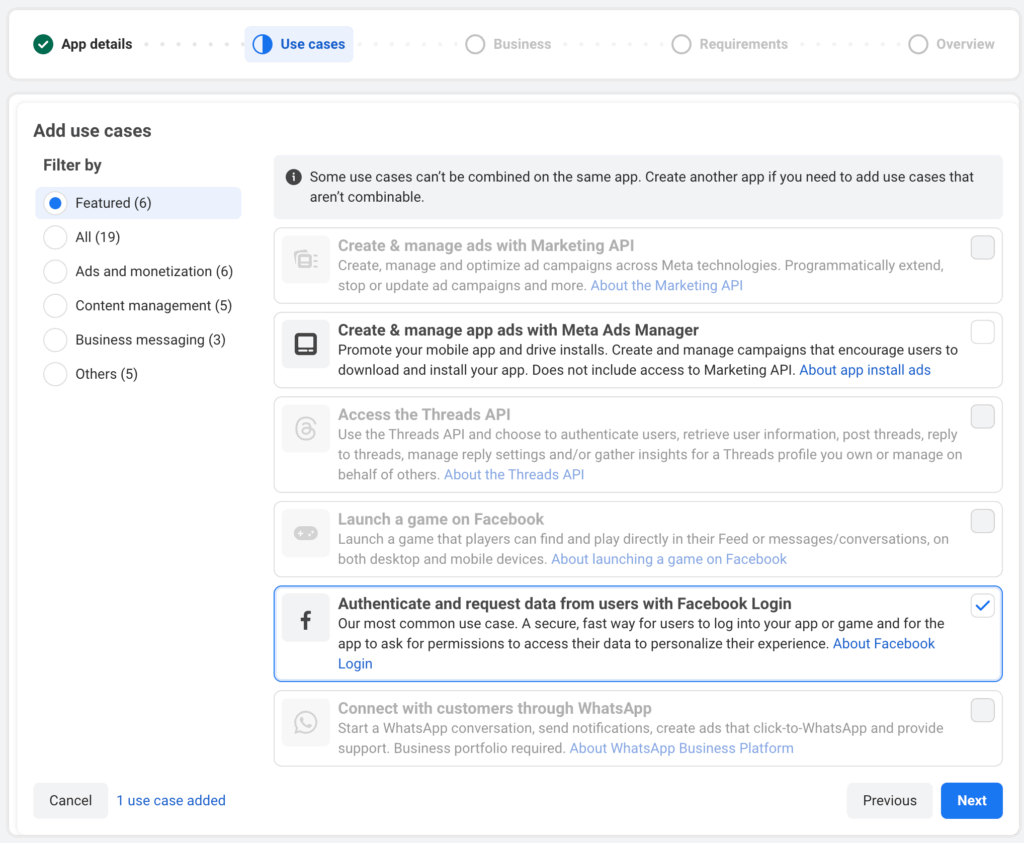
On next step it will ask for Use cases where you need to select Authenticate and request data from users with Facebook Login and click on next.
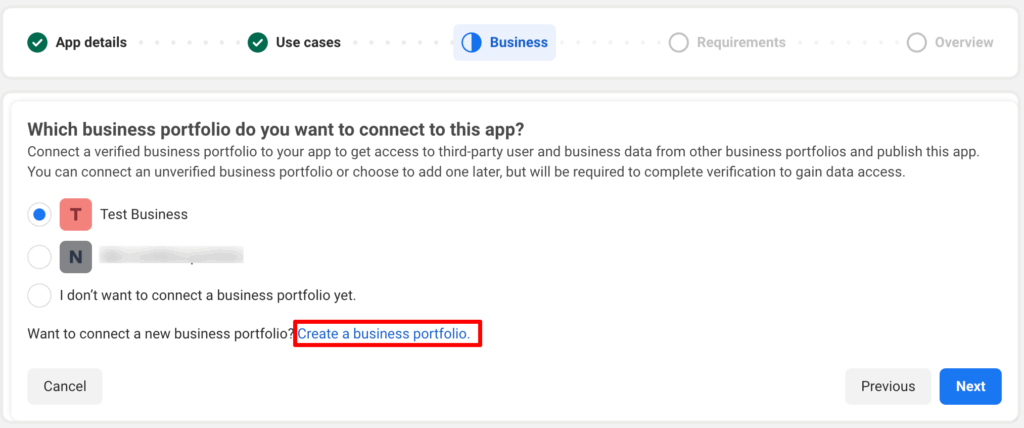
On next step it will ask for Business. You will need to create and verify your business portfolio to publish app. You can choose from existing one if you already have and then click on next.
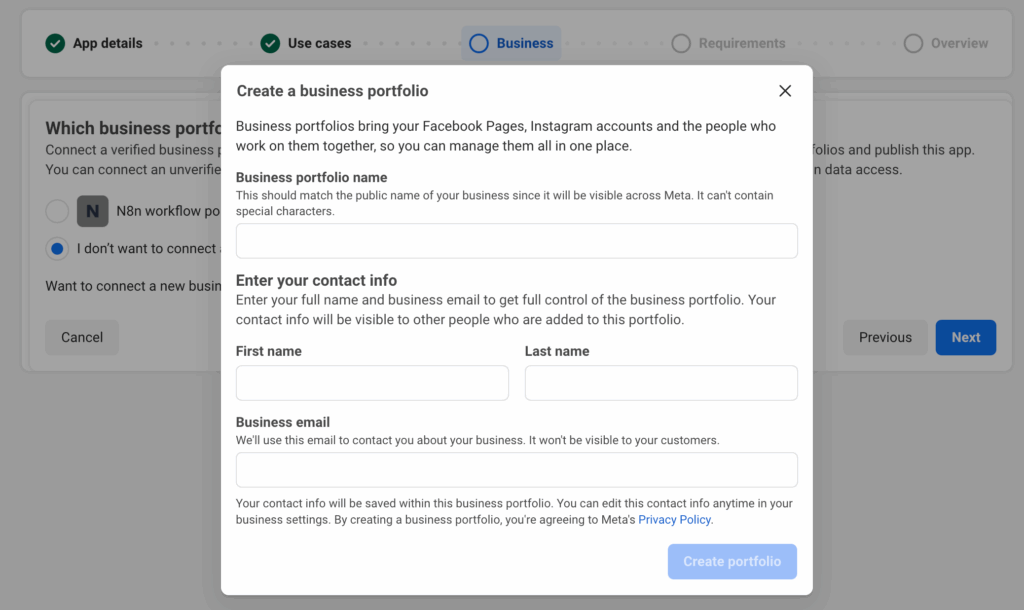
When you click on the create business portfolio then it will ask for basic details and then click on Create portfolio.
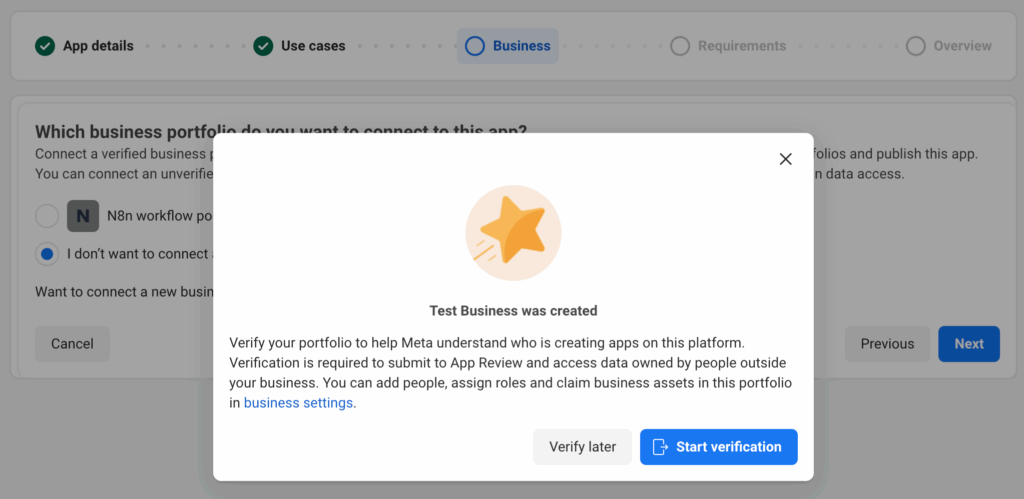
After you create portfolio it will ask to start verification if you want to publish the app now or you can do verification later if you want to test the app for now and publish later.
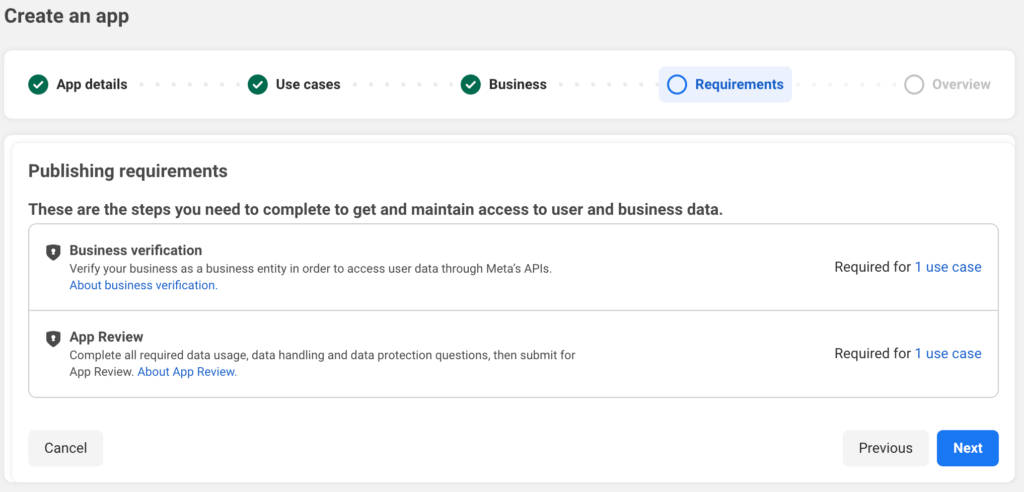
In next step it will show requirements to publish app and make it live which allows other users to login on your site via Facebook social login.
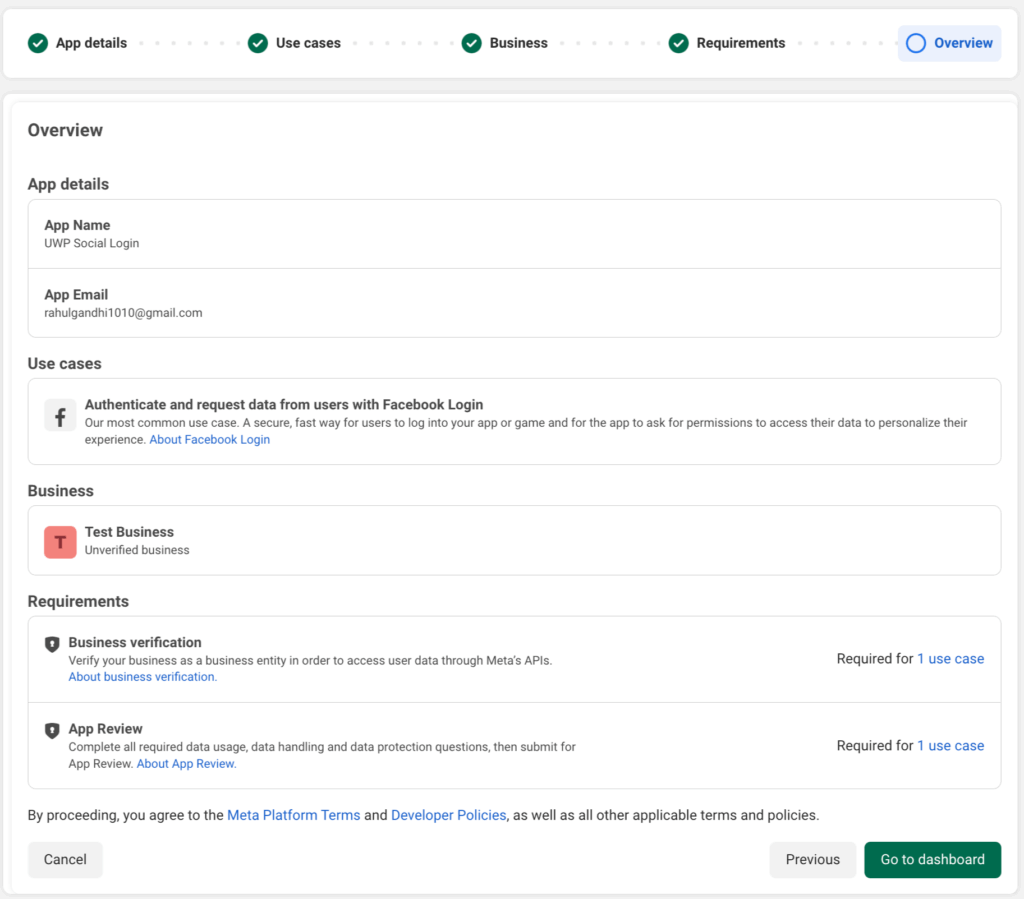
In last step, you can check all the details and click on Go to dashboard if all good.
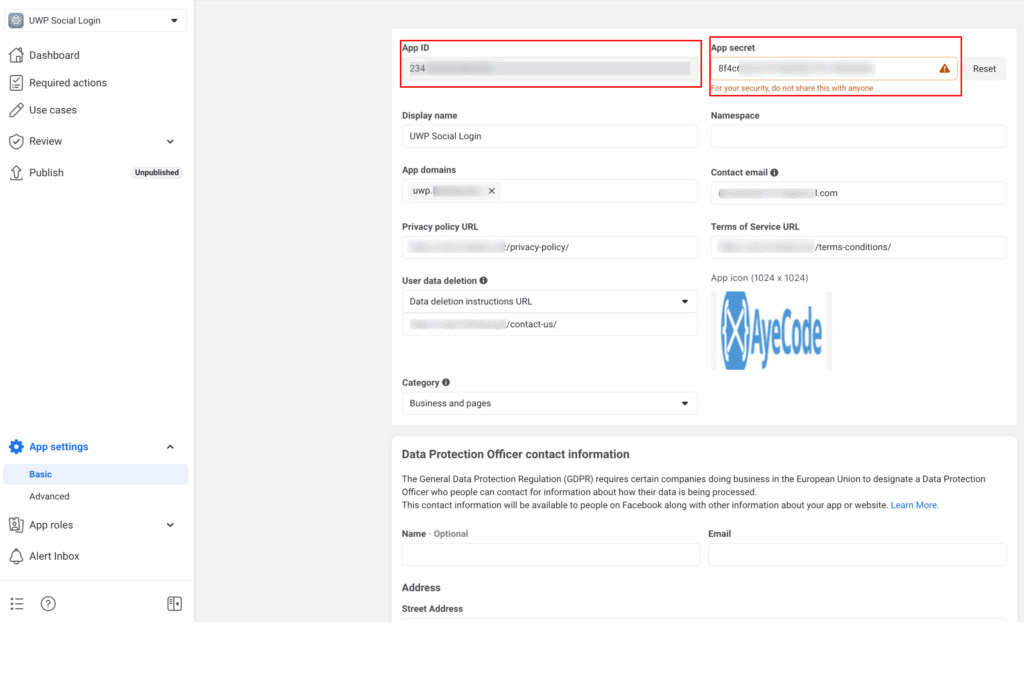
On dashboard, go to App settings from left side menu and click on Basic. You will see the App ID and App secret which you will need to add into UsersWP Social Login facebook settings. Also, you need to fill out all required information in Basic settings to complete the setup else you will face issues in social login.
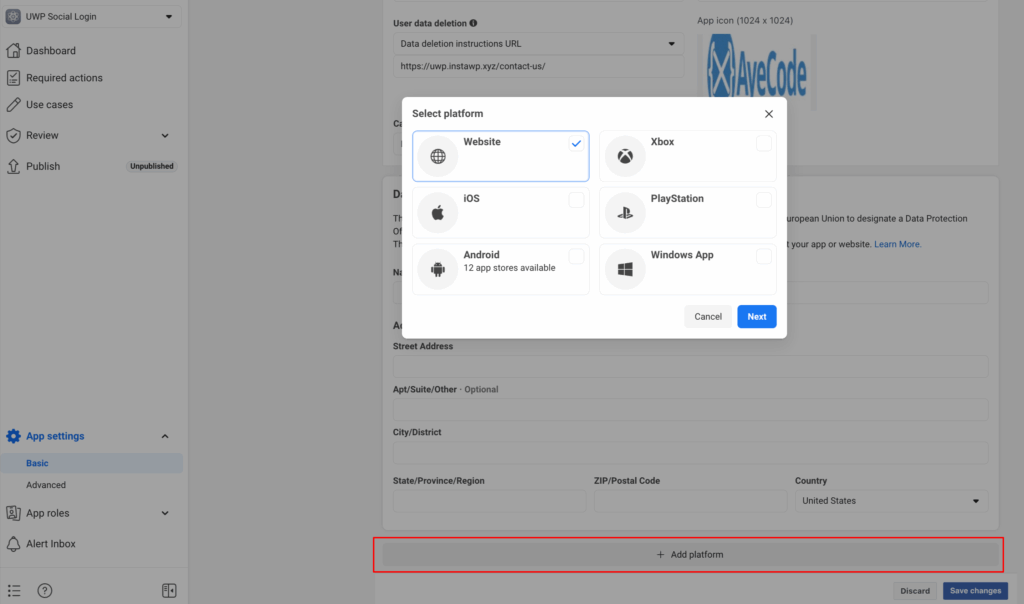
Next you need to click on add platform button in the same Basic settings page and then select Website and click on next button.
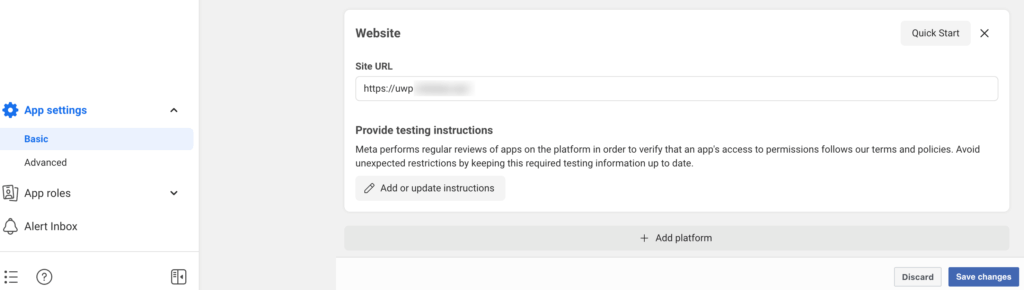
It will add a new section in the page where you need to enter your website URL and click on Save changes.
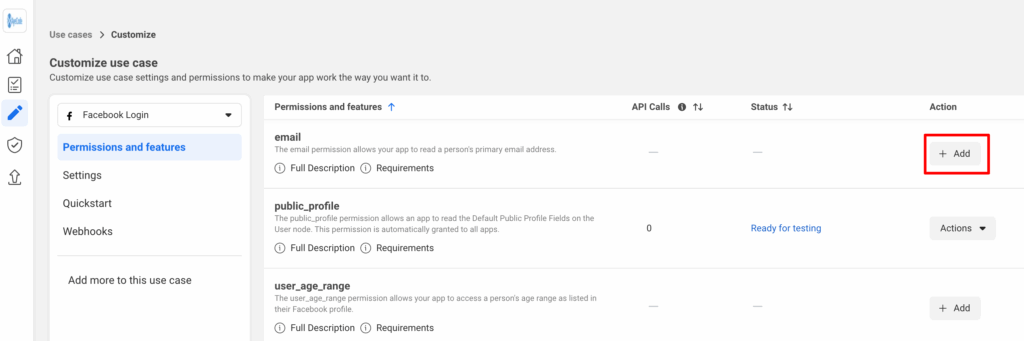
Next go to Use cases and click on Customise for the Facebook Login use case.

Now you need to click on Add for email permission as it will be used to create WP user account.
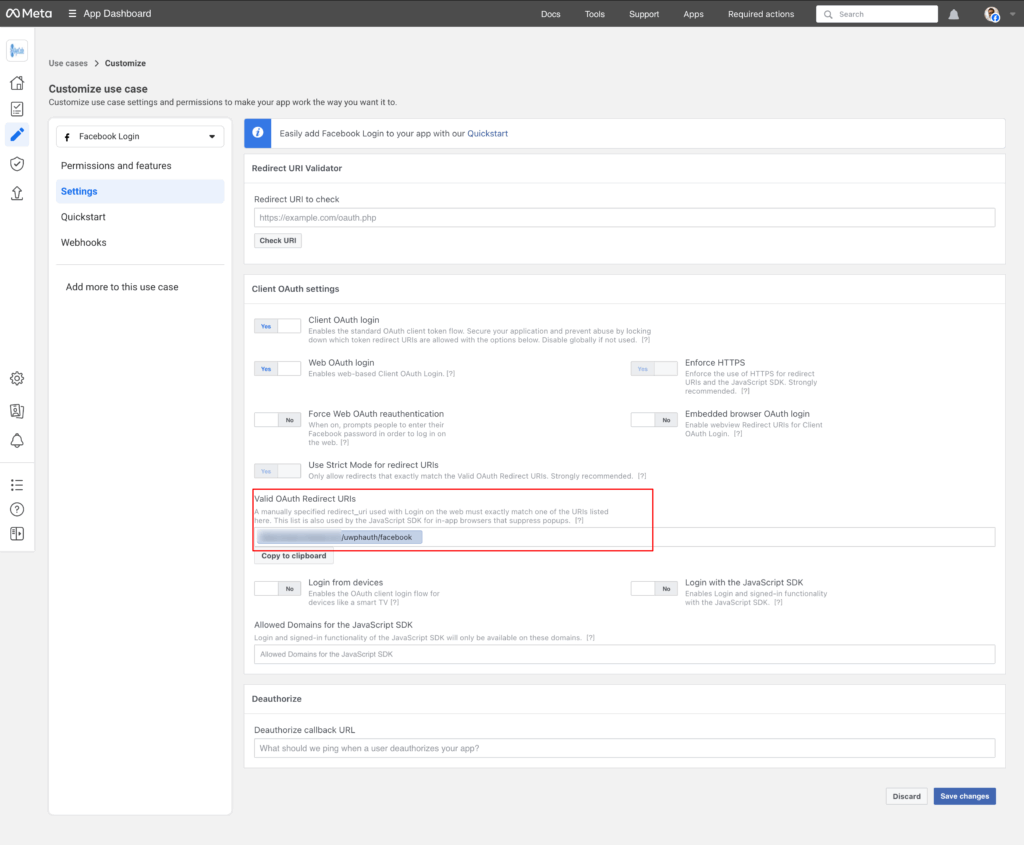
Now go to Settings and enter the Authorized redirect URI from UsersWP Social Login Facebook setting into the Valid OAuth Redirect URIs option in app and click on Save changes. The URI will look like https://yourwebsite.com/uwphauth/facebook.
Now, you need to complete the business verification process if still pending and publish the app and your website is ready to use Facebook social login feature.