How to Create a Church Member Directory

An accurate directory is necessary to run a successful Church organization.
With the proper setup, you could easily store and update member information, track attendance data, and manage other essential details.
But creating a church directory can be daunting, especially if you don’t have the right tools or resources.
So in this blog post, we’ll outline the steps you need to take to create an effective church directory that can help you manage your organization and keep members engaged.
Ready? Let’s go.
Printed vs. Online Directory: What they are & what goes into them
The first step in creating a church directory is to decide which type of directory you want.
You can choose between a printed or an online version.
Both a printed and online church member directory holds records of the names and contact information of members of a particular church.
These directories are typically organized alphabetically by last name and may include other details such as:
- the member’s address
- phone number
- email address
- the date the member joined
- their baptism or confirmation date
- Some churches may also include in the directory information about the member’s family or their involvement in the church.
Religious member directories help members of the church stay connected and informed about one another and provide a way for church leaders to contact members for various purposes such as outreach, pastoral care, or communication about events and activities.
Printed church directory: Pros & cons
Pros
- Great if you’re looking for something tangible that members can take home and reference at a glance.
- No additional software or hardware to set up
- Cheaper than online directories
Cons
- It can be easily misplaced or damaged.
- It wastes more paper and other resources.
- Way more difficult to maintain, as changes in member information will require a reprint of the directory. Many will therefore have an outdated version.
- It can cost more in the long run if you need to update the directory frequently.
- Limited distribution – only available to people with a physical copy, which may limit its accessibility to members who missed a copy or live far from the church.
Online church directory: Pros & cons
Pros
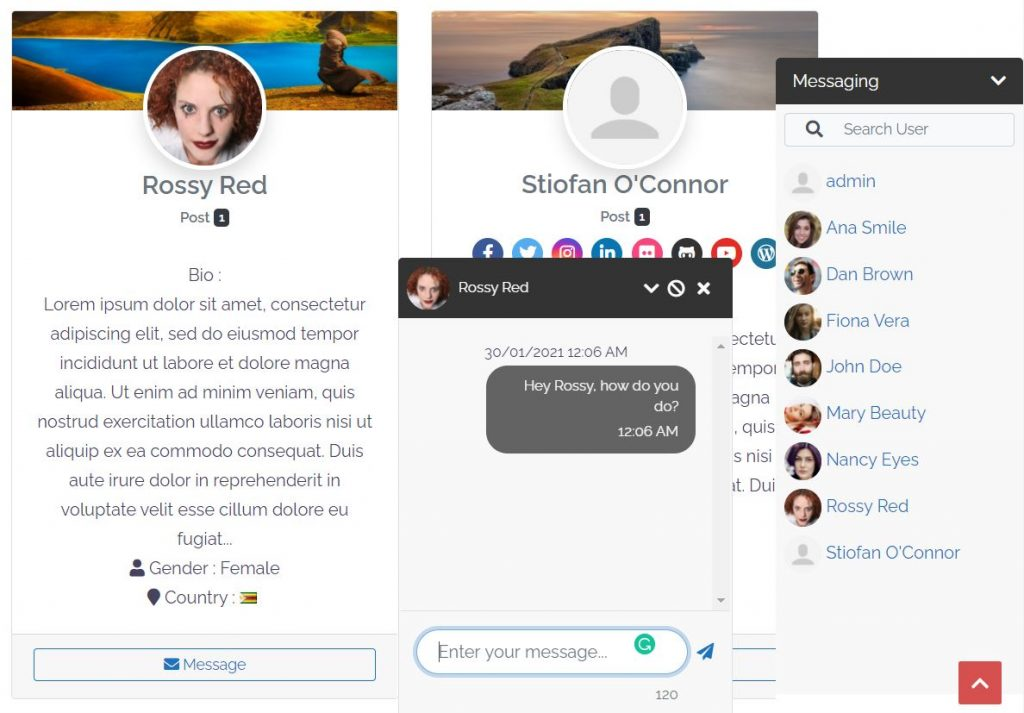
- More interactivity in the community: From setting a profile photo and bio to creating groups and sending friend requests, it’s much easier for church community members to plan activities and stay connected. It’s not just a plain directory anymore. It turns into an interactive community.
- Pastors and authority figures of the Church can make themselves easily identifiable with user verification badges.
- Community members can share and download digital products (e.g., music, sermons, scripts, etc.).
- Accessible from any device, members can stay connected regardless of their location.
- Easier to maintain and update as changes can be done in real time, and everyone can access updated information straight from the source.
- It can save time and money long-term by eliminating the cost of printing and distributing a physical directory.
- More privacy & security settings (e.g., UsersWp lets you exclude users from showing in the directory and keep new users on a waiting list to be approved inside)
Cons
- Requires additional software or hardware to set up, which requires some technical knowledge (nothing this blog post won’t teach you 😉).
- It may take more time to get up and running.
In today’s age, most churches opt for an online directory as it is easier and more convenient to maintain.
So this blog post guide will focus on how to create an effective online church directory.
Step 1: Gather Member Information
The first step in creating an online church directory is gathering information about the members you want to include.
This means things like:
- Name: Each member’s full name should be included in the directory.
- Contact information: This may include the member’s address, phone number, and email address.
- Family information: Some directories may include information about the member’s family, such as the names and ages of their children or spouse.
- Ministry involvement: The directory may include information about the member’s involvement in church ministry, such as serving on a particular committee or leading a small group.
- Photo: A photo of the member may be included in the directory, although some churches may choose not to include photos for privacy reasons.
- Baptism date: The date the member was baptized may also be included in the directory.
- Birthdays and anniversaries: The directory may include the member’s birthday and wedding anniversary, which can help send cards or make special recognition.
This can be done by asking members for their contact details. Be sure to also ask if they’d like their profile photo included in the directory and/or any other information about their involvement in the church.
But a less tedious way is to use UsersWP (a user directory plugin for WordPress) to send a custom pop-up registration form to collect the exact information needed from members when they visit your church website.
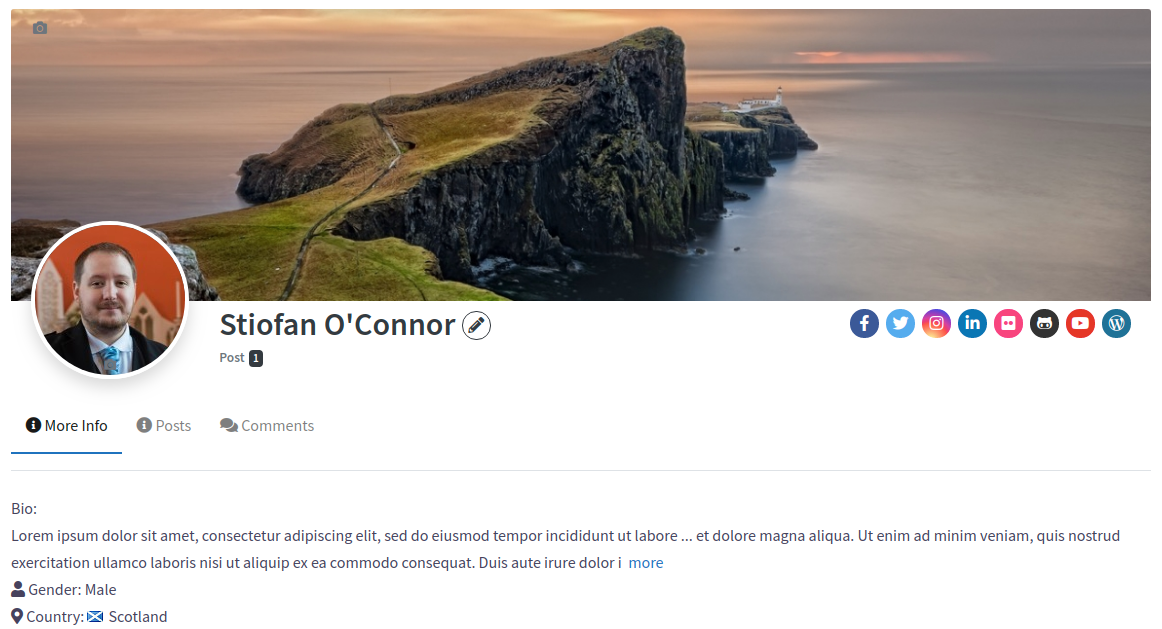
This is what a sample user profile might look like on your Church directory site:
Step 2: Determine the purpose and scope of the directory
Before getting started, decide what purpose your directory will serve and how much information you want to include.
This is important as it will determine the type of information you ask from users and help you create a structure for the directory.
You will also use it to communicate the incentive to join the directory.
For example, if you want a directory focused on connecting members, you might opt for user profiles, photos, and more personal information such as their interests, hobbies, etc.
On the other hand, if your primary purpose is for members to find each other’s contact details faster and easier, then you can keep it more basic.
If the goal is to be able to share information and resources, you might opt to include an online library of resources – like a blog tab.
Step 3: Design & Build the Directory
Now that you have all the information from your members, it’s time to create the directory.
For this, you’ll need a user-friendly platform like UsersWP, which makes it easy and efficient to design and build a church directory.
- Use the drag-and-drop forms builder to create a custom form and select the type of information included in each user profile.
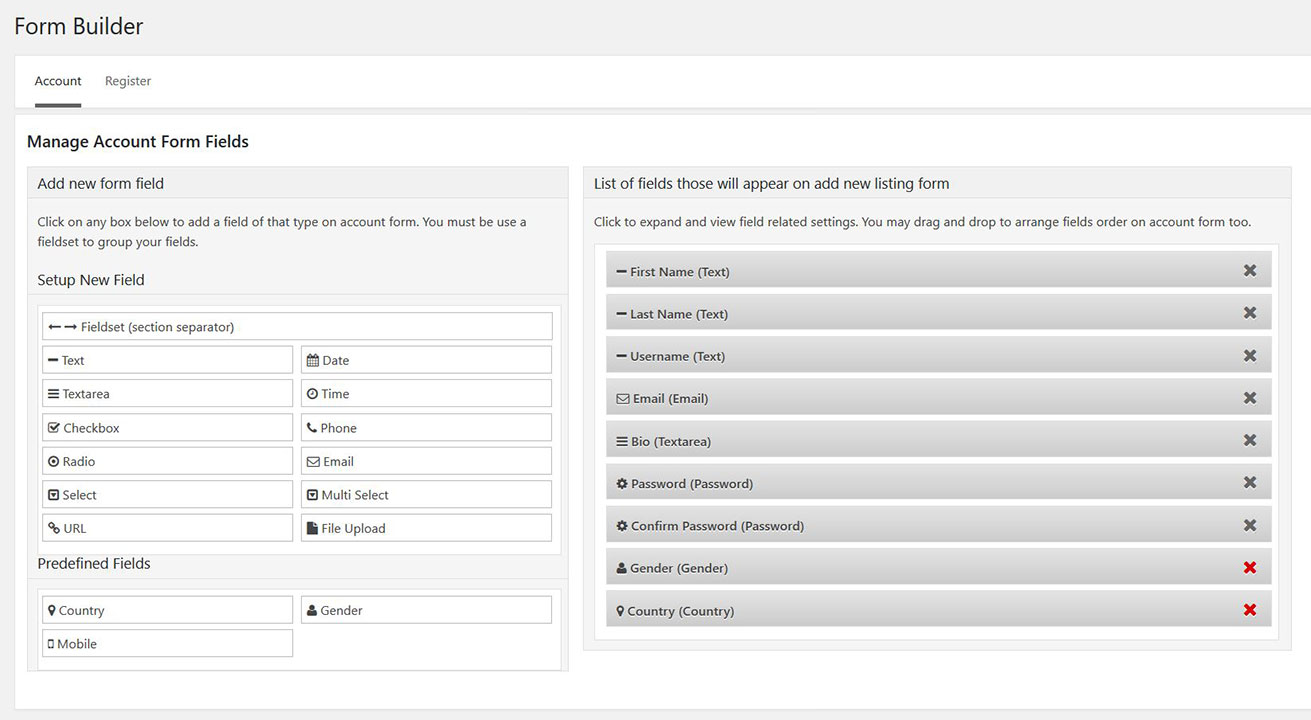
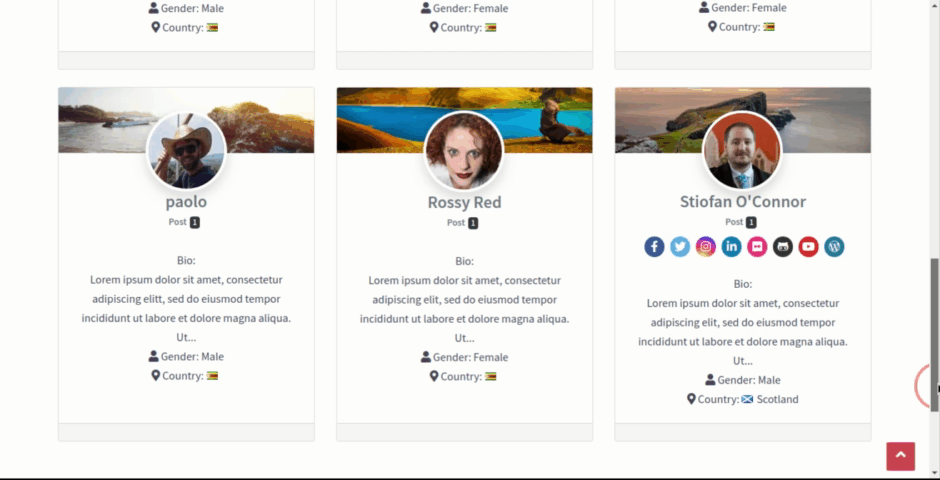
- Once you’ve created the form, it’s time to build the directory. Use UsersWP’s shortcodes and Gutenberg blocks to construct the directory layout, setting where profile pictures are shown, how many columns are used for each layout type, and even adding extra fields like bio or contact us.
- You can also customize the directory’s look by adding a custom logo and color scheme, as well as design elements like borders, backgrounds, or where any element of the user profile appears, like the Avatar, the header banner, the name, and all custom fields you created.
The great thing about UsersWP is that it offers some free extensions that make the signup process even faster and more secure, like the social login and ReCAPTCHA add-ons.
And to maintain communication with Church community members, you can add an option for users to subscribe to your newsletter through the Mailchimp integration during registration.
Step 4: Make the most out of your Church directory community
Now that you have all the information from your members and built your directory, it’s time to make the most out of it. Here are some pro tips to fully leverage your Church directory using UsersWP:
- Prevent spam & trolls with an approval process: Activate the user moderation system and approve every new user manually to ensure that only legit profiles are included in the directory. This way, you can avoid strangers and trolls disrupting your Church community’s peace.

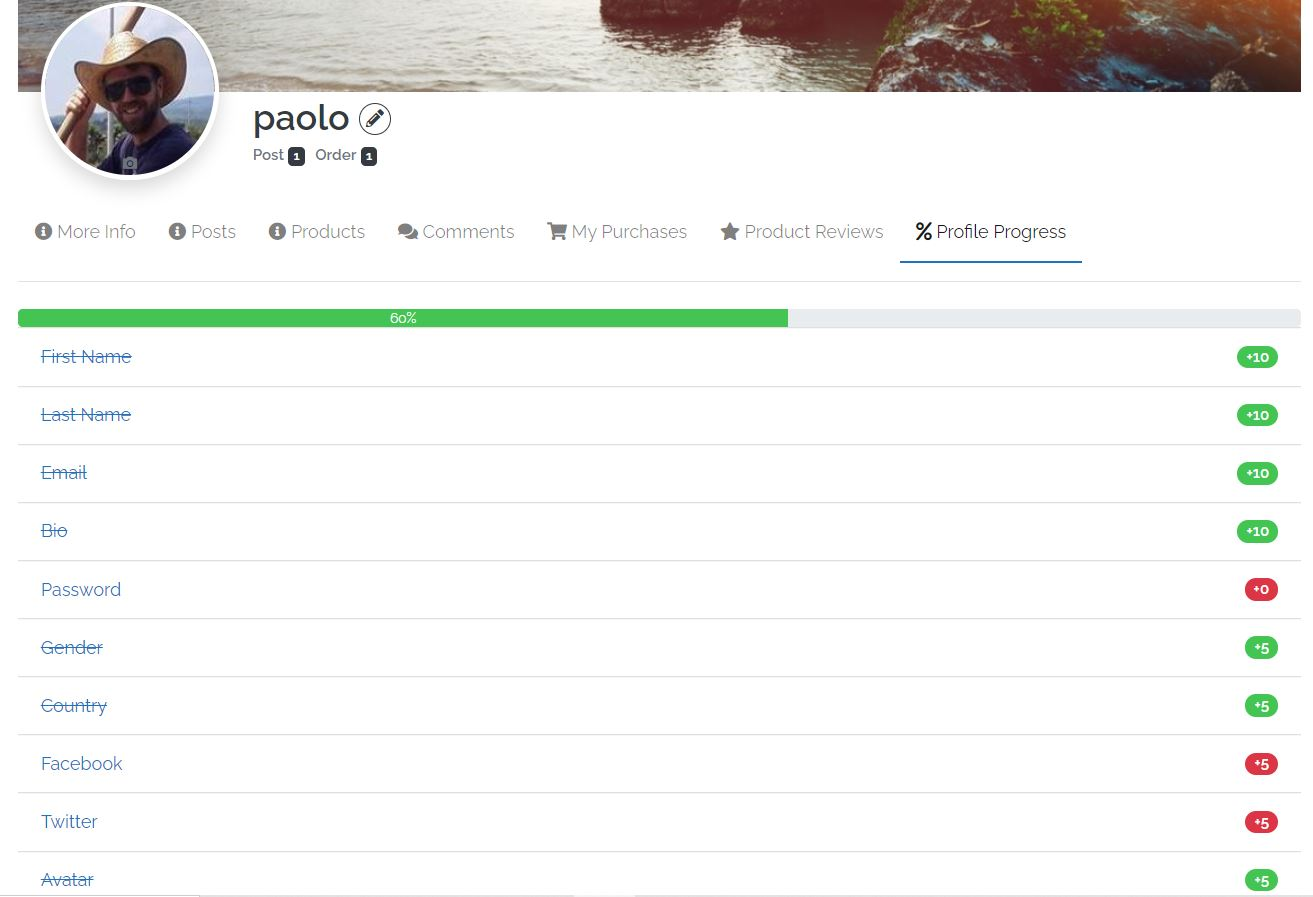
- Invite members to complete their profiles: Encourage members to add more information about themselves and photos by sending automatic emails with personalized messages, offering incentives, and/or showing users their profile completion progress.
- Engage with your members by enabling groups and chats: To keep the community alive and active, you can add a Facebook-like chat feature to allow users to talk in real-time or create Facebook-style groups where members can join and connect for a specific Church-related activity.
- Keep in touch with members outside your directory with the Mailchimp integration that lets users subscribe to your newsletter during registration.
- Enable real-time notifications to promote more engagement: Real-time notifications can help members stay updated about the latest activities in your Church directory and remind them when they have a new comment or message. This is a quick little trick to get members to spend more time in your church directory, stay connected, and be part of the conversations.
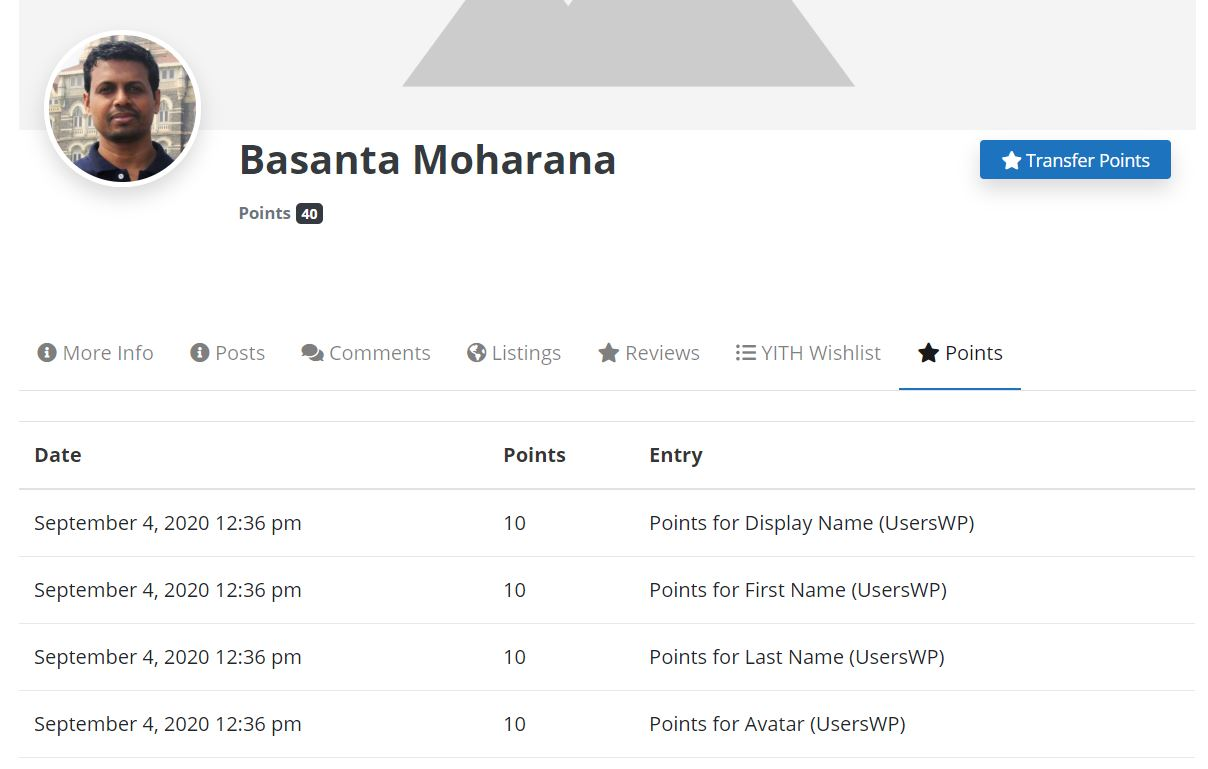
- Create a reward system as an incentive to engage: You can also create a reward system (based on badges and points) for members that complete a certain action on your site, using the myCRED add-on. For church community members, this could mean awarding points for volunteering, inviting friends to the community, or participating in church activities.
Step 5: Keep it secure
Now that you have a Church directory with all your members’ information, you want to ensure it stays safe from cybercriminals.
UsersWP has built-in security features that help you protect your data and keep out any malicious attackers.
You can:
- Enable two-factor authentication to add an extra layer of security for user logins using the Google Authenticator plugin.
- Activate a password strength meter to help users choose strong passwords that are not easy to guess.
- Set up reCAPTCHA to prevent bot and spam registrations.
Step 6: Update and maintain the directory
Finally, make sure that you keep your Church directory running smoothly.
The best way to do this is to regularly check for any necessary updates and run regular directory backups in case anything goes wrong.
You can also use monitoring tools like Google Analytics to track user activity on the site and identify any trends or issues that may need attention.
This way, you can keep your directory running like a well-oiled machine for years.
Private Church Community?
Should you wish for all community pages to be private and only accessible from registered and approved users.
In that case, you can easily do it by adding a content restriction plugin to the equation.
Several plugins will allow you to do that, and we suggest Content Control, which is excellent and easy to use.
Set up your Church directory with ease today
With these six steps, you now have all the information you need to create a Church directory with UsersWP. All it takes is a few clicks, and your community will be up and running in no time!
With a special bundle offer, you can download the core plugin today and get all the add-ons to make your Church directory even more powerful and secure. Check it out today.
Keith Norton
Does this system meet the requirements of Data Protection which my Church has concerns
Paolo
Yes it does. It’s built to keep data secure.