How to build a Community Directory with Advanced Search

A robust and feature-rich member directory can be the backbone of your organization’s community.
When it’s easier for members to find each other, it encourages collaboration and connection.
But how do you build a member directory and ensure your directory has the right capabilities?
In this guide, we’ll walk you through building a comprehensive directory of users with advanced search capabilities.
From setting up the directory to adding powerful search features, we have all the tips and tricks to empower your community connections today.
Ready? Let’s go.
Step 1: Planning out your member directory
The first step is to plan out the structure and features of your directory.
Start by considering the overarching goals and data type you want to include in the directory.
A. Define the goals and objectives of your member directory
Defining your goals and objectives will help you determine the features and functionalities you must include in your directory to achieve your desired outcomes.
- For example, if your goal is to increase member engagement, you may want to include social networking features in your member directory.
- Alternatively, if your objective is to improve knowledge-sharing, you may want to include data fields that allow members to showcase their areas of expertise.
- Or, if you want to facilitate networking opportunities, you may want to include a feature that allows members to search for other members based on their location or interests.
Whatever your goals and objectives may be, defining them clearly will help guide your decision-making throughout the directory-building process.
B. Identify the data custom fields you want to include in the directory
The data custom fields you include in your member directory will play a critical role in enabling members to find and connect.
When deciding on the data fields to include, think about the information that members would find most valuable when searching for others to connect with (this is why establishing your goals is so important).
Some examples of data fields that you may want to consider include the following:
- Industry
- Job title
- Location
- Skills and areas of expertise
- Education level
- Years of experience
- Professional achievements
C. Determine the access levels for different types of users
Not all community members may have the same level of access to your member directory.
For example, you may want to restrict access to specific data fields for members with a lower membership level using roles.
Conversely, you may want to provide additional access and functionalities for members who are in leadership positions.
By determining access levels for different types of users, you can ensure that members only see the information and functionalities that are relevant to them.
D. Choose a platform or tool to build your member directory
When choosing a platform or tool, consider your budget, the technical skills required, and the specific features and functionalities you need.
Additionally, it may be helpful to read reviews and compare different options to determine the best fit for your needs.
Always go for a tool with at least 1000 installations and 50 reviews.
This way, you can be sure that your member directory is powered by a reliable platform or tool.
If you’re using WordPress, then UsersWP is a great lightweight, secure choice with over 10,000 installations and 130 reviews (4.5 average).
Step 2: Setting up the Member Directory
Once you have planned and prepared your member directory with advanced search capabilities, the next step is to set it up.
Here are some key steps to consider:
A. Installing and configuring the chosen tool
The first step in setting up your member directory is installing and configuring your chosen platform or tool.
For an essential installation guide of UsersWp, you can watch this video.
We’ll outline the step-by-step in this article too.
Before we dive into setting up your member directory, there are a few things we need to make sure you have completed:
- Installed WordPress
- Adjust your Permalinks settings to anything other than Plain. To adjust your Permalinks settings, navigate to WordPress > Settings > Permalinks.
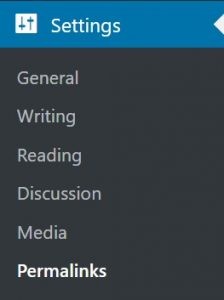
We recommend using Post Name, but any other setting will work.

Now that we have these steps covered, we can move on to installing and setting up UsersWP – you’ve got two options:
Automatic Installation:
- Navigate to Plugins > Add New
- Search for UsersWP
- Click “Install” and then “Activate.”
Manual Installation:
- Download the UsersWP plugin from https://wordpress.org/plugins/userswp/.
- Go to Plugins > Add New > Upload Plugin in your WordPress backend.
- Select the UsersWP plugin file you downloaded and click “Install Now.”
- Proceed to Activate the plugin.
Once you have successfully installed and activated the UsersWP plugin, you can start building your member directory!
B. Adding data fields for members to complete their profiles
To enable members to find and connect, you must include data fields allowing members to complete their user profiles.
This can be done through a customizable registration form, which enables members to showcase their skills, experiences, and achievements and lets other members search for them based on these factors.
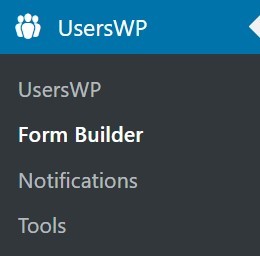
First, visit UsersWP – Form Builder – Account.
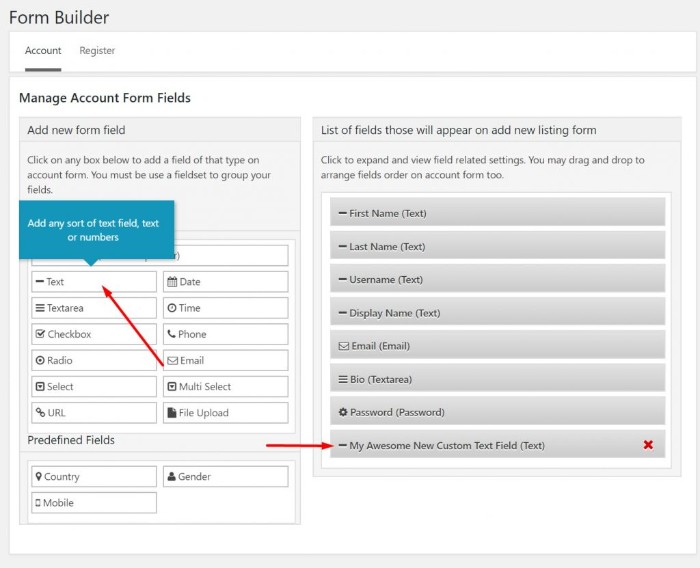
To add a new text field to your member directory registration form, follow these simple steps:
- Click on “Text” to create a new text field
- Edit the field settings to your liking
- Select “Yes” to show the field in the registration form
- Save the field
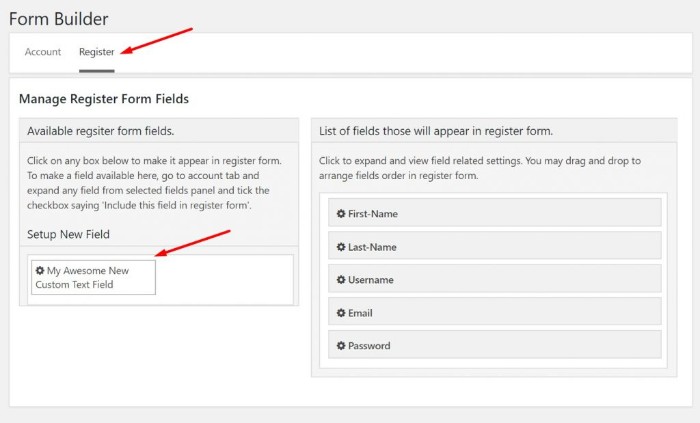
- Visit the “Register Form” tab and click on the new text field
- Drag and drop the field to reorder it as desired
- Visit your registration page in a different browser to see the new text field.
Each field has several possible settings.
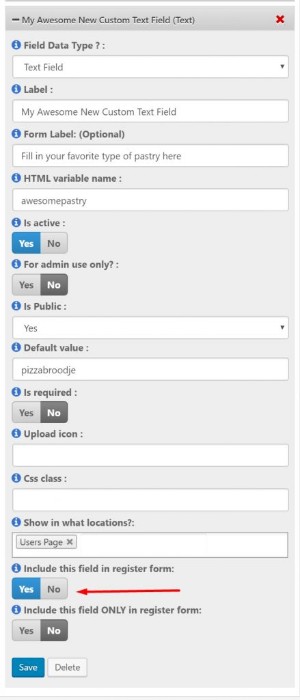
Let’s break down the different options you have when adding a new field to your member directory registration form:
- Label: The field’s name will be displayed all over the site.
- Form Label: If the label you want to display on the form is different from the main label, you can enter it here. For example, if you want to ask for someone’s age on the form but display “DOB” on the site, you would enter “What is your age?” as the form label and “DOB” as the label.
- HTML variable name: This is a unique identifier for the field used in the HTML. It cannot contain spaces or special characters.
- Is Active?: Select “No” if you want the field to be hidden from view.
- Is Public?: Select “No” if you don’t want the field to be visible to other users.
- Default Value: This is the default value displayed in the field.
- Is Required?: Select “Yes” if the user must fill out the field.
- Required Message: Enter the error message displaying if the field is required but not filled out.
- Upload Icon: Upload an icon or enter a font-awesome class for the field.
- CSS Class: This is the CSS class for the field. “uwp_social” is a reserved class. If you use this class and the field type is URL, it will display as social buttons.
- Show in What Locations?: Choose where you want to display the field, including Users Page, More Info Tab, Profile Page Own Tab, Profile Side, and Register Form.
- Include this field in Register Form: When this option is enabled, the field will appear in the register form.
- Include this field ONLY in Register Form: When this option is enabled, the field will ONLY appear in the register form.
By customizing these options, you can create a registration form that collects all the information you need from your members and display it in a way that makes sense for your community.
You don’t want to make the registration form too long since this may deter users from completing it.
So save the nitty gritty details for the “Account” form we demonstrated earlier.
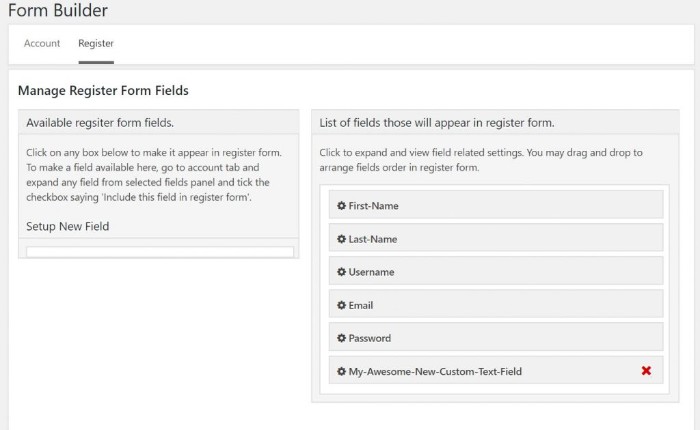
Your custom field in the registration form will look like this on the back-end setup page.
C. Configuring membership levels and permissions
To ensure that members only see the information and functionalities that are relevant to them, you need to configure membership levels and permissions using roles.
This will help you determine which members can access which parts of the directory or other website sections.
Some examples of membership levels and permissions that you may want to include are:
- Different levels of access based on membership type (e.g. primary, premium).
- Different access levels for members based on their seniority or leadership roles.
A free plugin like content control will help you achieve this with UsersWP.
D. Creating a visually appealing user interface
To ensure your member directory is user-friendly and easy to navigate, you must create a visually appealing user interface, so members quickly find the information they need.
- Choose a clean and simple design.
- Use a consistent color scheme and typography.
- Include clear navigation menus and search functionalities.
- Add engaging and relevant imagery.
Step 3: Implement advanced search capabilities
Now it’s time to make your community directory powerful – making it easy to find others based on certain factors.
A. Choosing the proper search criteria based on your goals and objectives
When deciding on the search criteria for your advanced member directory, it’s important to remember your community’s goals and objectives.
Here are a few examples of different scenarios that may influence your search criteria:
- Networking opportunities: If your main objective is to encourage members to network and collaborate, you may want to include search criteria such as industry, job title, area of expertise, and location. This will allow members to find and connect with others who share similar interests or are in the same area.
- Job opportunities: If your member directory is focused on professional development and helping members find job opportunities, you may want to include search criteria such as job title, years of experience, and education level. This will allow members to search for jobs or connect with other members who can help them in their job search.
- Social connections: If your member directory is more social, you may want to include search criteria such as hobbies, interests, and personal preferences. This will allow members to find and connect with others with similar interests and build meaningful relationships.
By choosing the proper search criteria, you can create a search functionality that is tailored to the needs and goals of your community or organization.
This will help members find the information they need quickly and easily and make meaningful connections within the community.
B. Creating filters to enable users to refine their searches
Once you’ve chosen your search criteria, you can create filters to help users refine their searches and allow them to focus on the most relevant results with the Advanced Search add-on.
This will appear on the same bar as your Account and Registration settings.

Whenever you create a custom field, there is an option to activate it so that your users can use it in their advanced search filters.

For example, if you create a field for gender and add it as an advanced search filter, users can refine their search to find only male, female, transgender, gender-neutral users, and so on.
Similarly, you can create fields and filters for other criteria such as country of origin, age range, profession, relationship status, city of residence, and date or place of birth.
Users can refine their search by offering these options to find members who meet specific criteria.
To make the search even more precise, you can combine filters.
For example, you could search for female users from the United States who live in Mexico and are within the age range of 20-30.
By using a combination of filters, you can provide users with a more granular search experience, allowing them to find the results they are looking for quickly.
By combining advanced search criteria and filters, you can create a powerful member directory to help users find the information they need quickly and easily.
This will empower your members to connect meaningfully and strengthen your community relationships.
C. Adding features to make the directory more interactive
Your member directory doesn’t have to be just a list of profiles. Adding the following features can create a more engaging and valuable community for your members.
- Social networking features like chat, messaging, and forums can help members connect and collaborate more effectively.
- Integrating with third-party tools like CRM and marketing automation systems can help you track member engagement and provide more personalized experiences. (UsersWP’s Zapier integration is coming soon)
- Enabling members to showcase their work, products, or services can help them build their brand and attract new clients or customers.
- Incorporating feedback mechanisms, such as surveys or polls, can help you gather input from your members and improve your member directory over time.
You can turn your member directory into a dynamic hub for collaboration, networking, and professional development using these features.
Create a member directory with advanced search capabilities on UsersWp today
An influential member directory is a foundation for building a strong and vibrant community.
By choosing the proper search criteria, enabling advanced search filters, and adding interactive features, you can create an engaging platform that will empower your members to connect and strengthen their relationships.
The opportunities are endless—try UsersWp out today and see how it will impact your community.
Good luck!