WordPress User Registration Form: How to Create One Free in 2026 (Step-by-Step)
Most “WordPress user registration form” tutorials recommend a form builder plugin like WPForms or Gravity Forms.
That recommendation is wrong for most operators.
A form builder creates a form that creates a WordPress user account on submission.
That is one piece of what you actually need.
A real user registration system also needs: a front-end login page, a member profile page, an editable account page, password reset, custom user fields, profile visibility controls, and ideally moderation and notifications.
WPForms gives you the form.
You then need to install a member plugin on top of WPForms to handle the rest, or build the profile pages by hand.
And WPForms user registration is a paid feature, locked to the Pro tier at $199.50 first year.
This guide shows you how to set up a complete user registration system on WordPress in under 10 minutes, with the free UsersWP plugin, no upgrade required.
What You Will Get
By the end of this tutorial, your WordPress site will have:
- A working user registration form on a dedicated /register page
- A front-end login page (not the default wp-login.php)
- A member account page where users can edit their info
- A public profile page for each member
- Password recovery and reset pages
- A members directory listing all registered users
- Optional moderation, notifications, profile progress, and email marketing integration
Total cost: $0.
Total time: under 10 minutes once WordPress is installed.
New User Registration in WordPress: How It Actually Works
Before the step-by-step, a quick explanation of what happens when a new user registers on a WordPress site.
WordPress ships with a built-in user system, but the default user registration flow is hidden behind the /wp-login.php?action=register URL, has no front-end profile or account page, and looks identical to the WordPress admin login screen.
For most sites, that default flow is unusable.
Visitors expect to see a branded registration page that matches the rest of your site, with a real form, real fields, and a real “what happens next” experience.
A real WordPress user registration system has five moving parts:
- The registration form itself, on a dedicated /register page that matches your site’s design
- The new user account, created automatically in WordPress when the form is submitted (with the correct role, which is Subscriber by default)
- The confirmation flow, which can be an on-page message, a redirect to an onboarding page, an email confirmation, or all three
- The login and account pages, so the new user has somewhere to log back in and manage their information
- The profile page, which is the user’s public-facing identity on the site (if your site has a community or directory aspect)
A form builder gives you parts 1 and 2.
UsersWP gives you all five, on activation, automatically.
The steps below cover the configuration to make the default setup match your specific needs.
Before You Start: Set Permalinks
UsersWP and most modern WordPress plugins require non-default permalinks to work.
Navigate to Settings > Permalinks in your WordPress admin.
Choose Post Name (or any setting other than Plain).
Click Save.
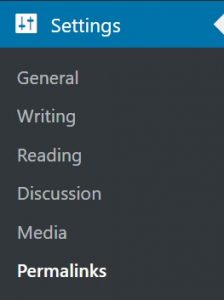
Permalinks set. Move on.
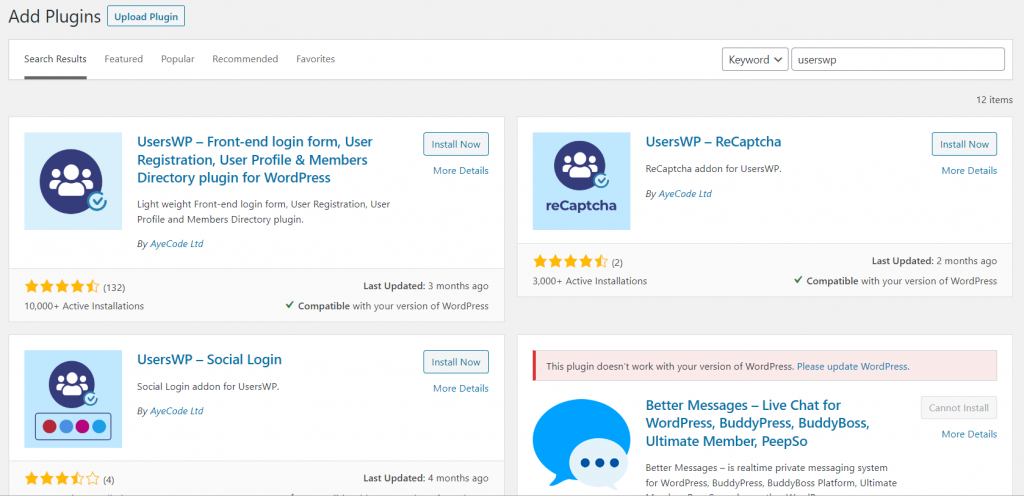
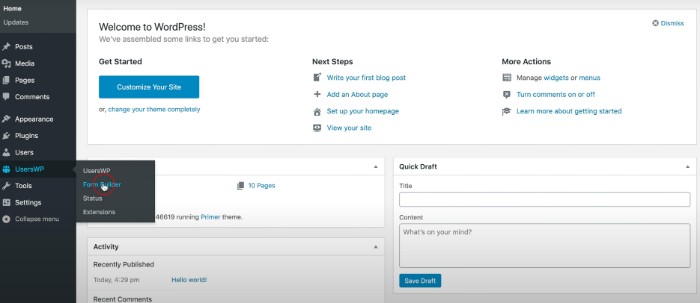
Step 1: Install the Free UsersWP Plugin
Navigate to Plugins > Add New.
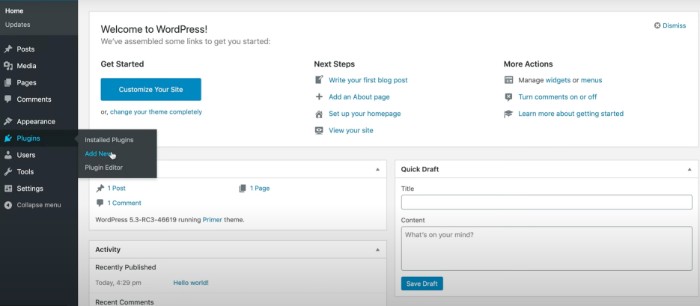
Search for UsersWP.
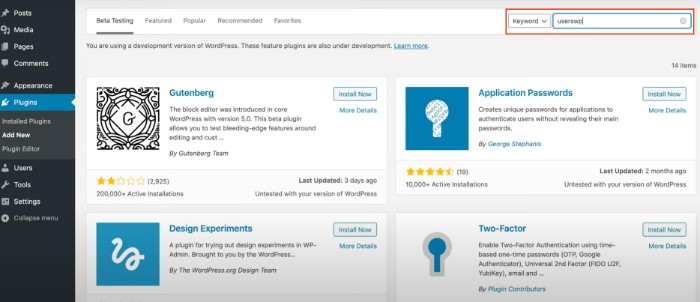
Click Install, then Activate.
On activation, UsersWP automatically creates all the pages you will need: Register, Login, Account, Profile, Password Recovery, Change Password, Reset Password, Users Directory, and User Profile Item page.
You can skip the setup wizard if it appears.
Most operators do not need to change the default configuration.
Step 2: Add the Registration Page to Your Menu
Visitors need a way to find your registration page.
Navigate to Appearance > Menus.

UsersWP adds a dedicated section to the menu editor called UsersWP Endpoints.
These are the smart links UsersWP uses to show the right page depending on whether the visitor is logged in or out (the Register link automatically becomes My Account once the user is logged in, for example).
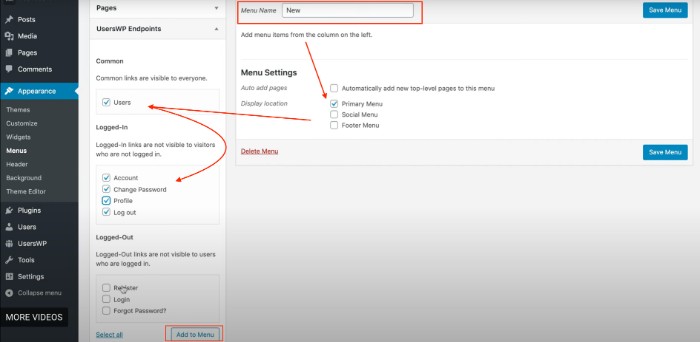
Select the endpoints you want in your menu and click Add to Menu.
Drag-and-drop to arrange them as needed.
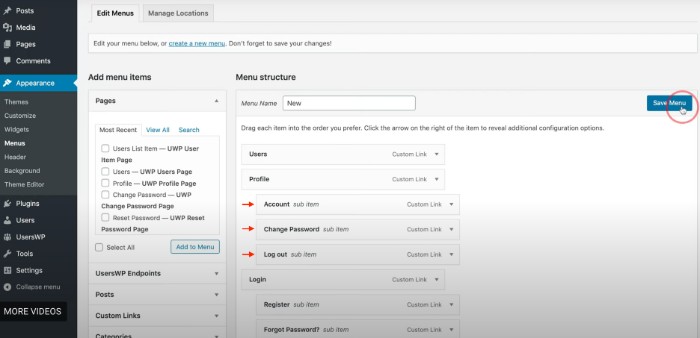
Save the menu.
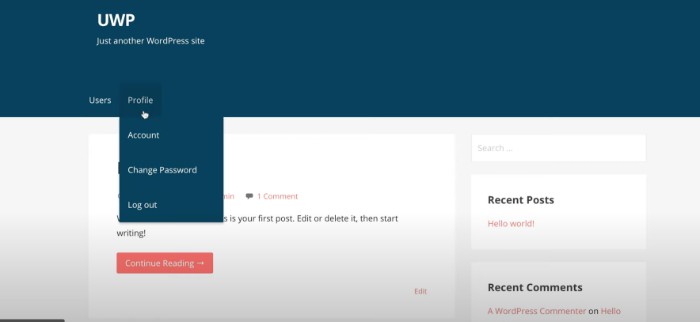
The registration page is now linked from your site navigation.
Step 3: Design the Registration Form Fields
UsersWP ships with a default registration form that works out of the box (username, email, password).
For most sites, the default is enough to start collecting registrations.
If you need additional fields, navigate to UsersWP > Form Builder.
The form builder lets you add custom fields based on your business need.
A few common examples:
- Job title, company, expertise (professional networks)
- Location, neighborhood (local directories)
- Interests, hobbies, topics (community sites)
- Goals, experience level (course sites)
- Social media links (any community site)
- Dietary preferences (food sites)
Drag fields from the left panel into the form layout on the right.
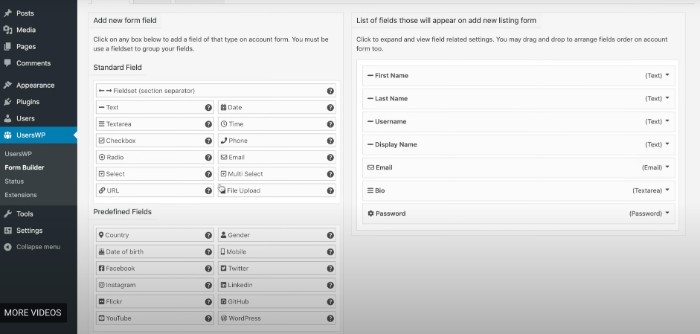
Each custom field can be configured to appear on the registration form, the account edit page, the public profile page, or any combination.
Save the form.
Click Visit Site to see it in action.
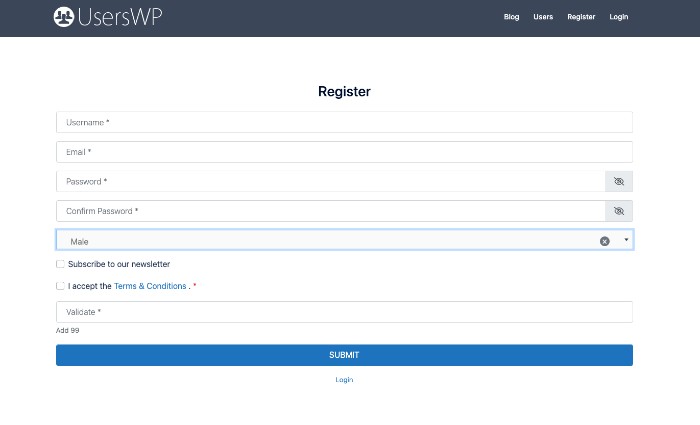
The form is live and accepting registrations.
Step 4: Set the Post-Registration Flow
The journey does not end at form submission.
UsersWP offers three confirmation types after registration, configurable in the Form Builder settings:
- Message: show a thank-you message on the same page (simplest option)
- Show Page: redirect to a specific page on your site (useful for onboarding flows)
- Go to URL: redirect to a custom URL (useful for external onboarding, course platforms, or multisite networks)
Most sites benefit from the Show Page option, pointing to an onboarding page that orients new members before they explore the site.
Step 5: Moderate New Signups (Optional)
Spam and fake accounts are a fact of life for any open WordPress site.
UsersWP offers two layers of protection.
The free reCaptcha add-on adds Google’s bot protection to the registration form, which handles most automated signup attempts.
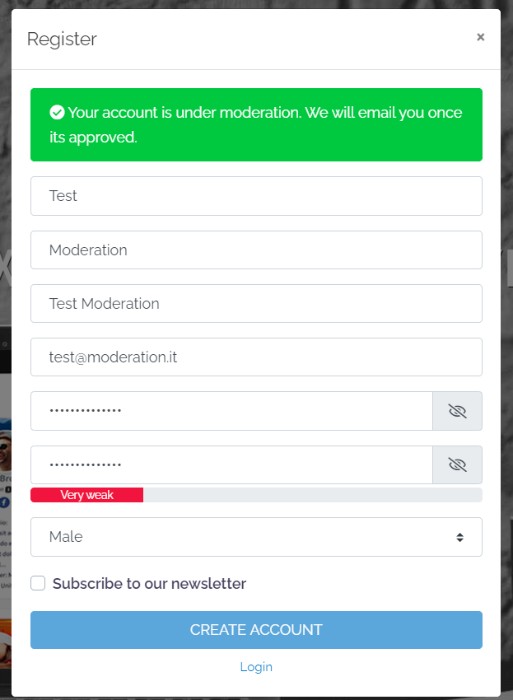
The Moderate User Registration add-on adds a manual approval step: new accounts are held pending until an administrator approves or rejects them.
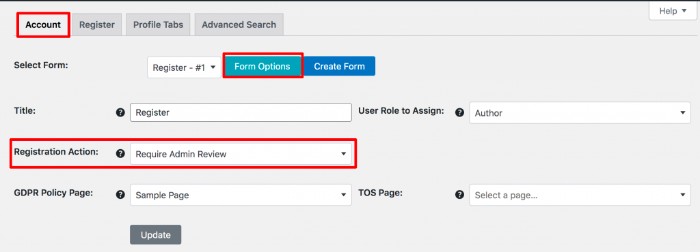
When active, the moderation add-on adds a Require Admin Review option to the Form Builder under Form Options > Registration Action.
New users who register receive an email saying their account is under review.
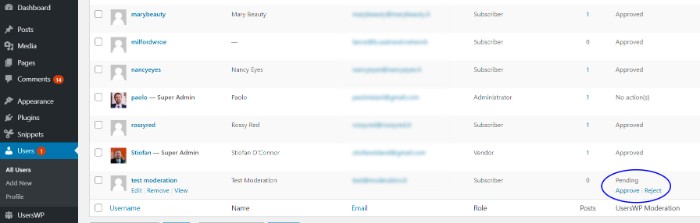
Administrators can approve or reject pending accounts from the Users list or directly from a user’s profile.
For automatic protection against specific bad actors, the Restrict User Signups add-on auto-rejects registrations from specific usernames, email addresses, or entire domains.
Step 6: Add Real-Time Notifications (Optional)
The default WordPress new-user notification emails work, but they are dated and not configurable.
The Real-Time Notifications add-on upgrades the notification system with configurable templates for new registrations, profile updates, friend requests, follows, and verification requests.
Both administrators and members get notified appropriately for the relevant events.

Step 7: Encourage Profile Completion (Optional)
The Profile Progress add-on displays a completion bar on each user’s profile.
You set the completion percentage for each profile field in UsersWP > Addons > Progress.
The bar serves as a gentle reminder for users to finish their profile, which dramatically increases the share of members who complete their information.

Available as a widget, Gutenberg block, or shortcode for flexible placement.
Step 8: Connect to Your Email Marketing Tool (Optional)
Registered users are your best email marketing audience.
UsersWP integrates natively with 11 popular newsletter and email marketing plugins, including Mailchimp, Constant Contact, Brevo, MailerLite, ActiveCampaign, ConvertKit, and others.
You add an opt-in checkbox to the registration form.
New members who check the box get automatically added to your mailing list on registration.
The integration is bi-directional for some providers (member updates sync to the email tool, email tool unsubscribes reflect in WordPress).
Step 9: Enable Community Features (Optional)
If your registration system is the foundation for a community, two add-ons take it from a contact database to a real member network.
The bbPress integration connects UsersWP profiles to the popular free bbPress forum plugin, so member profiles tie into forum discussions automatically.
The Private Messages add-on adds Facebook Messenger-style direct messaging between members.
Together they turn a registration form into a working member community without adding BuddyPress or BuddyBoss to the stack.
Free vs Paid: What You Actually Need
The free UsersWP plugin handles the complete user registration system: form, profile pages, account pages, login, password recovery, members directory, and basic customization.
For 80% of operators, the free plugin is everything they need.
The optional add-ons cover specific extensions: moderation, reCaptcha, profile progress, real-time notifications, email marketing integrations, content restriction, paid memberships, private messaging, bbPress integration.
You can buy individual add-ons for $29-$49 each.
For sites that need multiple add-ons, the UsersWP Membership bundle at $49/year for a single site or $99/year for unlimited sites includes every premium add-on for a fraction of the per-add-on cost.
For comparison, WPForms charges $199.50 first year for user registration on the Pro tier and gives you only the form (no profile pages, no account pages, no members directory).
You then still need to install a member plugin to handle everything else.
Final Thoughts
A WordPress user registration form is one piece of a complete member system.
The form by itself does not give your users a place to log in, a profile to maintain, an account page to edit, or a way to recover a forgotten password.
The free UsersWP plugin gives you the form plus all of the rest, in under 10 minutes, with no upgrade required to ship the basics.
For deeper builds, see our guide to the best WordPress membership plugin for most people, our step-by-step paywall tutorial, or our breakdown of membership plugins vs subscription plugins.
Install the free version today, ship the registration form this afternoon, and decide on paid add-ons only when you actually need them.